
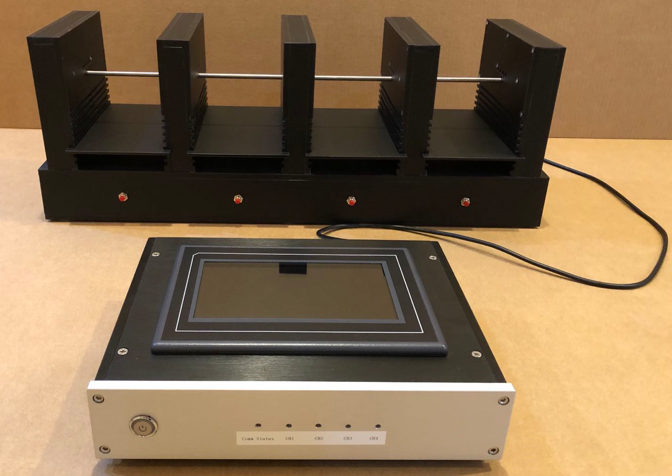
Main Screen
Step 1: Initial Power On
The main screen appears as below after power on:

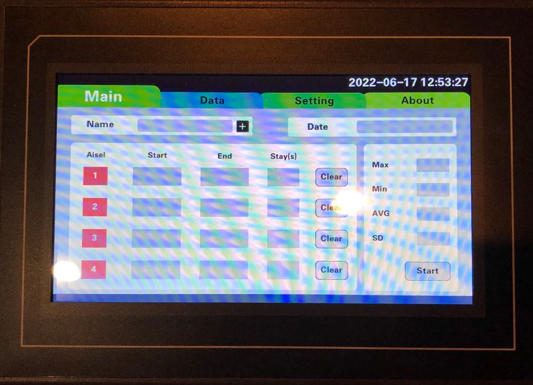
Step 2: Access Main Screen
Tap on the screen, the main screen appears:
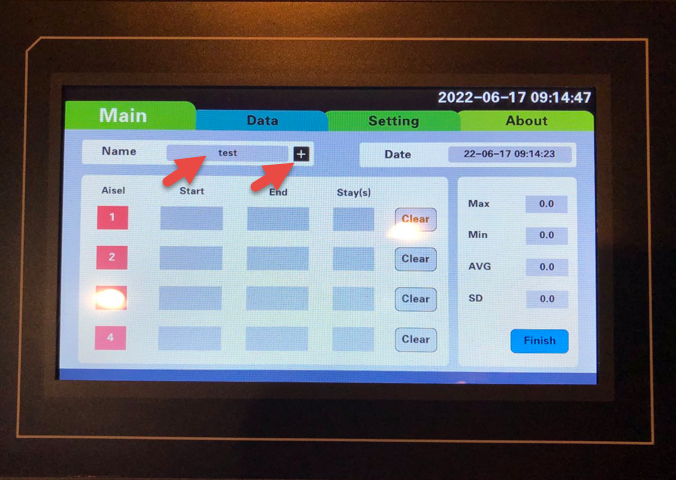
Step 3: Create Test Name
Click on + button to create a test name (like test below):
Step 4: Start Test Mode
Click Start button, the system will be in the test mode and the button shows Finish. Once the animal is put on a lane of the bar (say #1), the Start field will record the start time, and the Stay(s) will be updating per second. When the animal is off the bar, the End field will record the end time and Stay(s) stop updating.
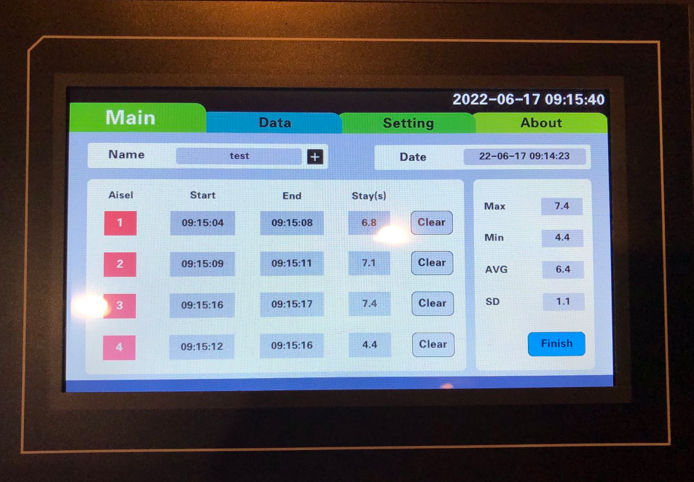
Step 5: Complete and Save Trial
When this trial is complete, click Finish button and the data is saved. A hundred datasets can be saved. However, we suggest users to export datasets frequently.
Note: Since each lane data is recorded separately, the Clear button allows the user to restart the recording for a lane. Until the user is satisfied with the trial for all lanes, the user can finish the trial.
Data Screen
The data screen shows the datasets of the complete trials.
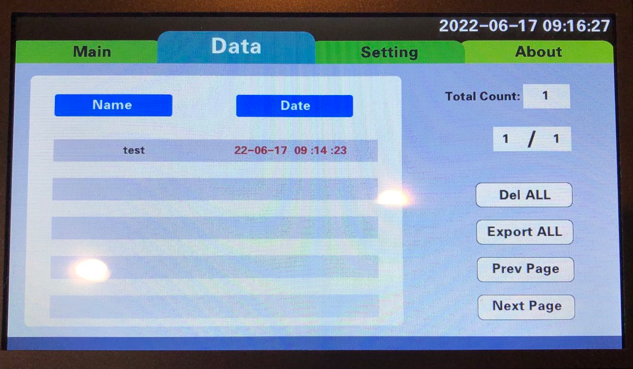
Click on the dataset, the detail of the dataset is displayed:
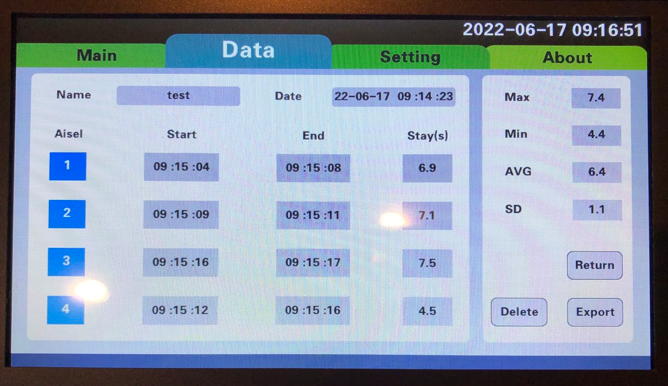
The user can delete the dataset or export the dataset. To export the dataset, the user click the Export button. Make sure the USB drive is inserted before Export operation is performed.
Setting Screen
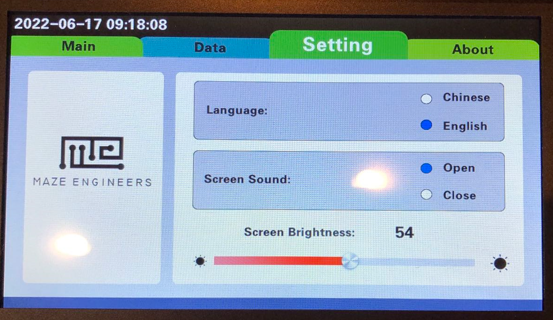
The setting allows user to set language preference, screen sound and brightness.