Electric Von Frey User Manual
Contents
- Description
- Key features
- Operating steps
- 3.1 Connection
- 3.2 Main Screen
- 3.3 Setting Screen
- 3.4 Start Screen
- 3.5 Start Test in Automatic Mode
- 3.6 Start Test in Manual Mode
- 3.7 History Screen
- 3.8 Calibration
- 3.9 Switch off Battery
Description
The von Frey monofilament was designed by Maximilian von Frey as an esthesiometer in 1896. These filaments have been widely used in the assessment of mechanical nociception. The process of assessment of punctuating mechanical allodynia and hyperalgesia involves the application of von Frey filaments of forces ranging anywhere and observing the withdrawal thresholds.
The most used method is the up-down method, wherein the tips are smoothly applied perpendicularly to the skin of the plantar surface of the subject until they buckle. However, the technique tends to be time-consuming. The Maze Engineers electronic von Frey (MEVF) is used to overcome the disadvantages of the conventional von Frey assay.
Key features
- Touch screen: high responsive capacitive touch screen
- Measurement precision: within 0.01 g
- Battery time: long battery time up to 8 hours; short time period for full charge
- Data: store 100 data sets and easy to navigate
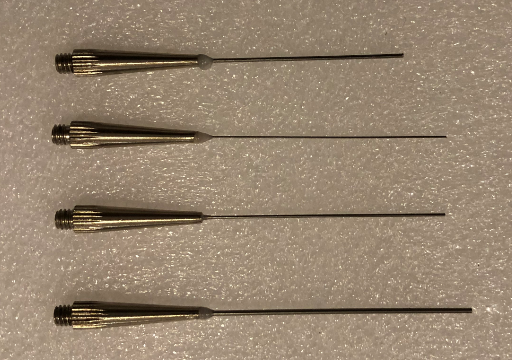
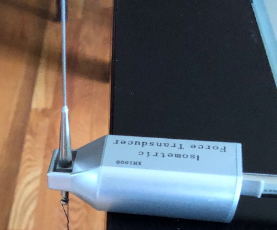
- Filaments: four rigid filaments (0.4, 0.6, 0.8, 1.0 mm diameter on tip and 50-55 mm long)
Operating steps
Connection
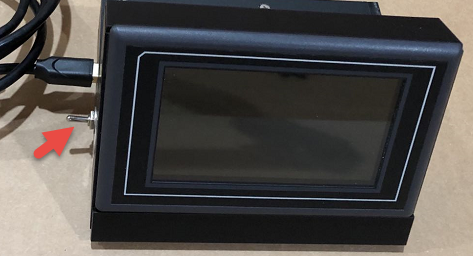
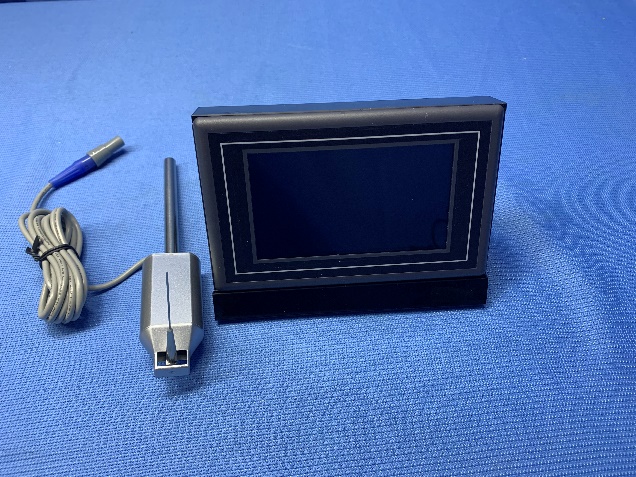
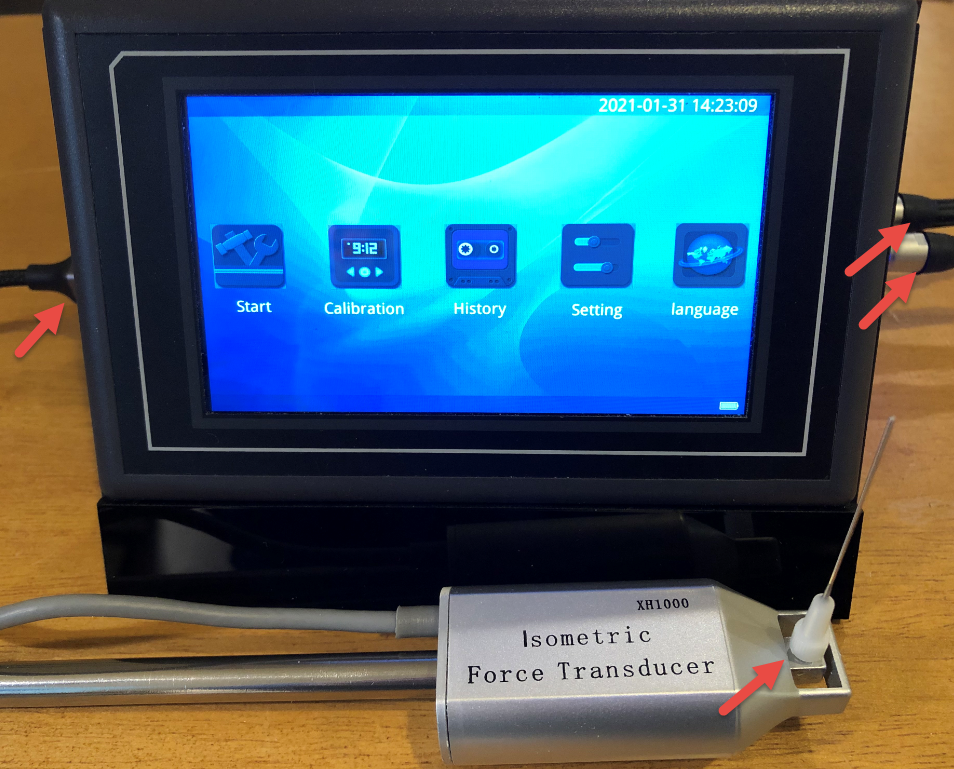
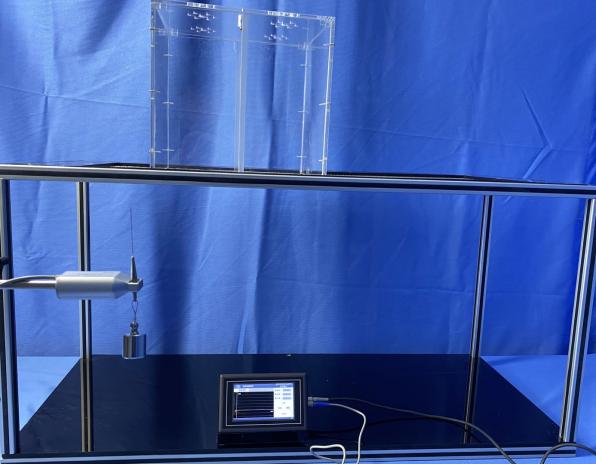
Connect to power source (on left, other end USB connector like iPhone), force sensor (grey on right) and foot switch (blue on right).
Connect a filament and the force transducer as shown below. Choose the size of a filament according to the animal.
The battery level is shown on the right bottom of the screen. When it is low, the power charge is needed.
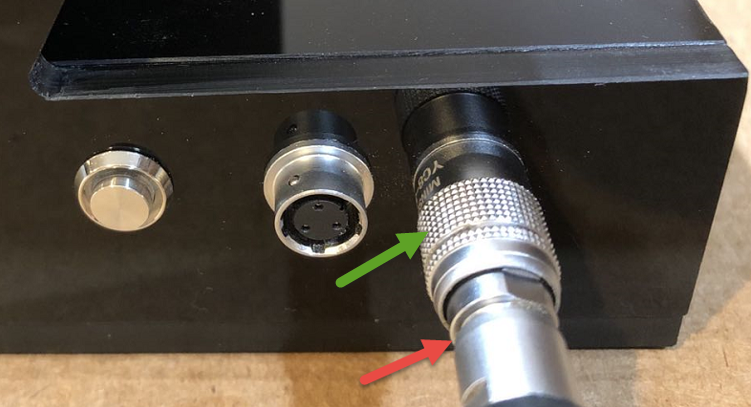
If the connector type is as shown above, tighten the cable clockwise (Red arrow above) after the insert to make sure the connection is well secured. To remove the cable, make sure to untighten the cable before pulling out the connection.
To connect, hold the connector at the red arrow part; and to disconnect, hold the connector at the green arrow part.
Main Screen
Press the power switch on the right panel for about 3 seconds. The main screen is shown as below when power is on:
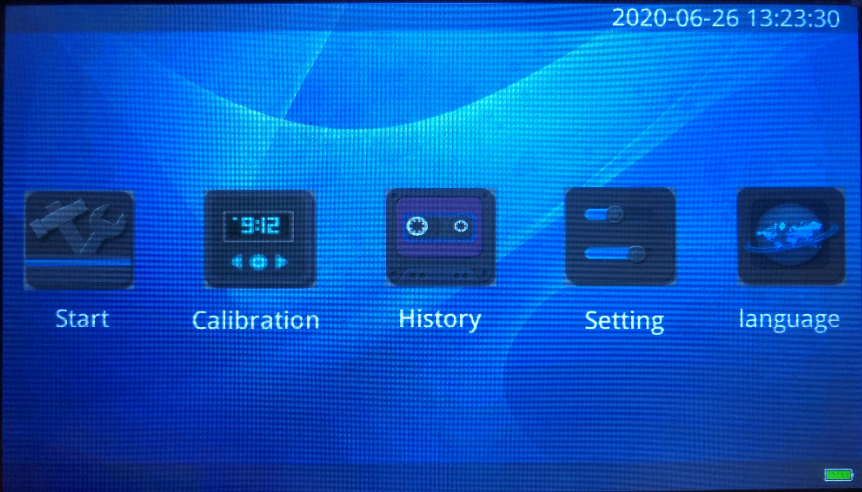
Date time setting: Press the date time field for about 3 seconds and the field becomes editable. Enter your local date time.
To turn off the power, press the power switch again.
Setting Screen
Press Setting on the main screen to enter the setting screen:
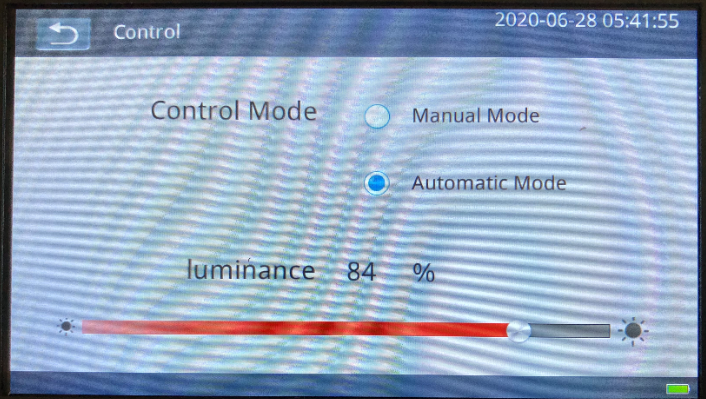
Choose control mode: Manual or Automatic and then return to the main screen.
The default is Automatic mode that is simple and sufficient for most situations of testing.
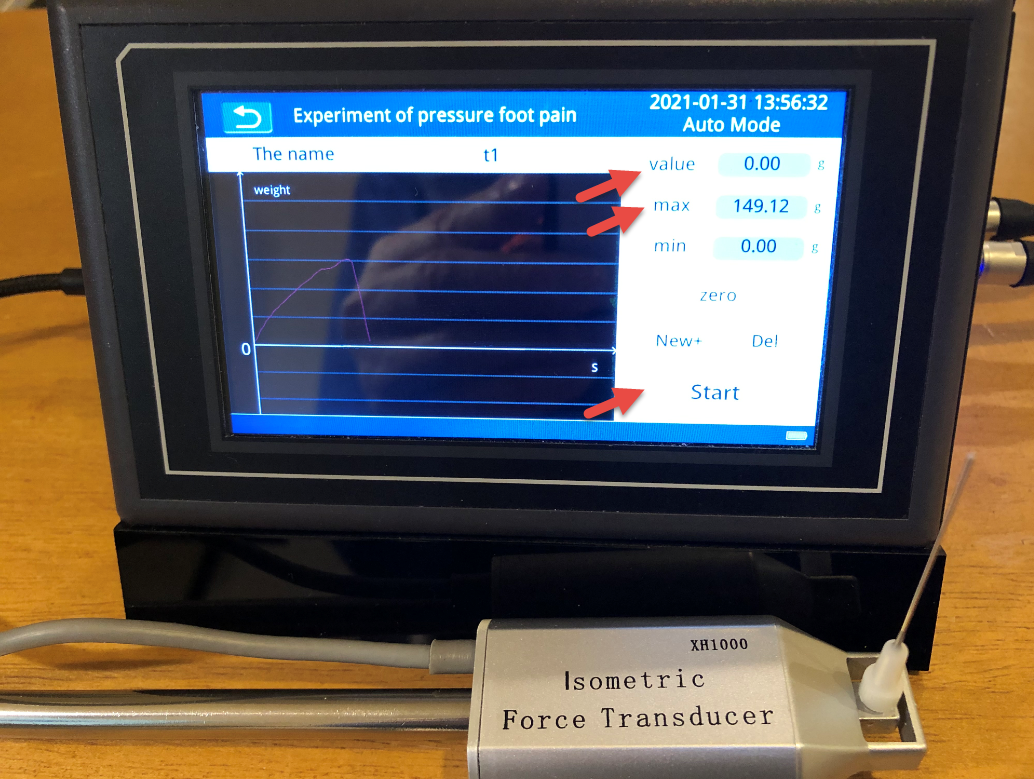
Start Screen
Step 1: After Setting is complete, navigate back to Main Screen and then to Start Screen.
Step 2: Press New+ button to enter an experiment name, say t1 in the picture below. Then press zero to clean screen data.
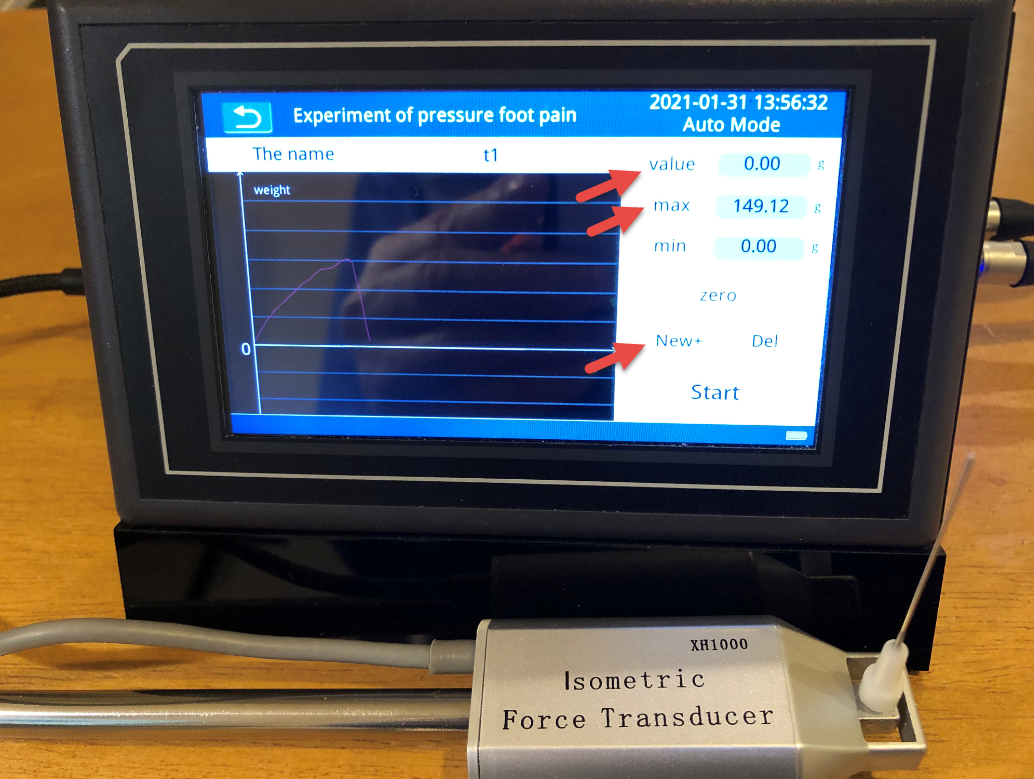
Start Test in Automatic Mode
To start a trial, smoothly apply perpendicularly to the skin of the plantar surface of the subject until they buckle.
When the filament touches the skin of the planter, the value tracks the current force and the max tracks the max of this trial. The Start field becomes Stop.
When the filament is released, the value comes down to zero while the max stays. The Stop field becomes Start.
When a trial completes, a trial sequence number is appended to the test name, like t1(1) in the picture.
Note that Start / Stop field displays the current state of a trial. It is not an action button.
The user can continue to do many trials for this test.
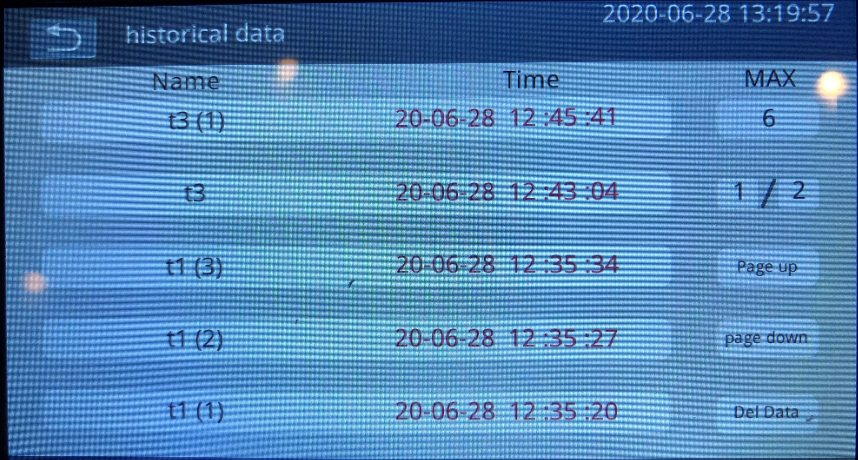
To view the test results, return to main screen and go to History screen. The history screen shows all results of test trials. Click on the data set row to view the details (max value). Use page up / down to navigate the result data sets.
Start Test in Manual Mode
To start a trial, in Start state, user must press the foot switch and then smoothly apply perpendicularly to the skin of the plantar surface of the subject. When the foot switch is first pressed, the state changes from Start to Stop. To end the trial, the user must press the foot switch again (in Stop state).
The data record and review are the same as in Automatic mode.
History Screen
Go to History screen from the main screen.
The history screen shows all results of test trials. Click on the data set row to view the details (max value). Use page up / down to navigate the result data sets. The user can choose to delete the data.

There is no functionality of exporting the results from the device. The user has to manually copy the max values from the history screen.
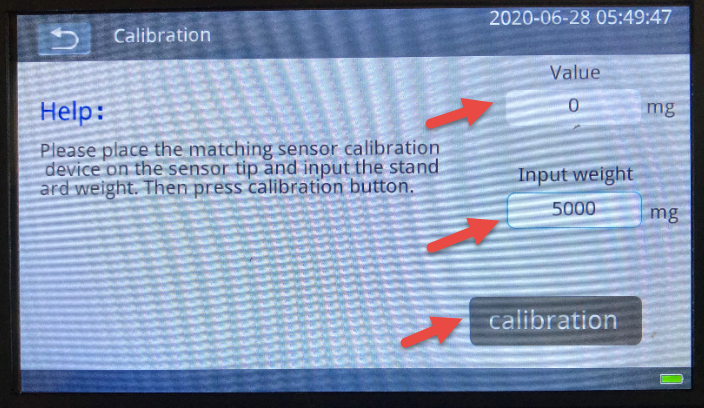
Calibration
The force calibration is performed when the force transducer is replaced. If you have the original sensor and device, the calibration is not required.
Step 1: Connect the filament on the top with label Force Transducer and the calibration weight (50 mg) on the bottom.
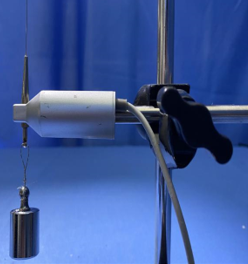
Step 2: Wait 1-2 minutes for the weight to be stabilized.
Step 3: Go to the Calibration screen from the main screen. Input weight 50000 mg and press Calibration button.
Step 4: The calibration is done when the value field is 0. Return to the main screen before remove the weight.
Switch off Battery
If you plan not to use the device for long time period, switch off the battery power.