Hot Cold Plate User Manual
Contents
- Description
- Key features
- Operating steps
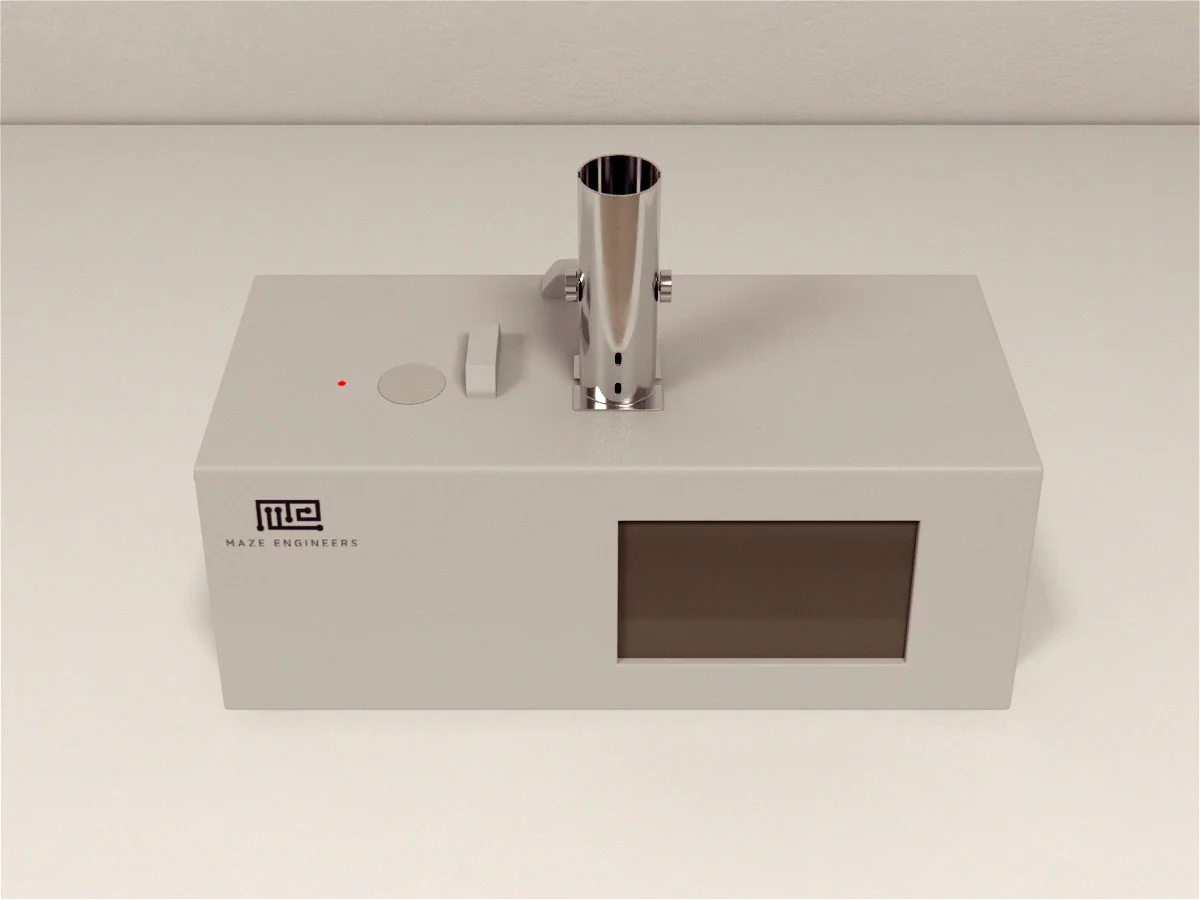
- 3.1 Connection
- 3.2 Main Screen
- 3.3 Setting screen
- 3.4 Start screen
- 3.5 History screen
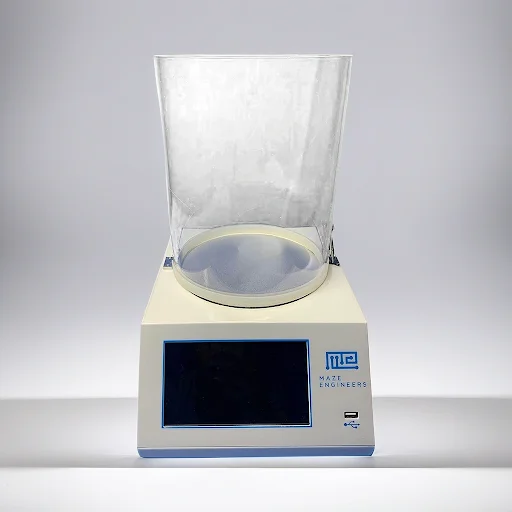
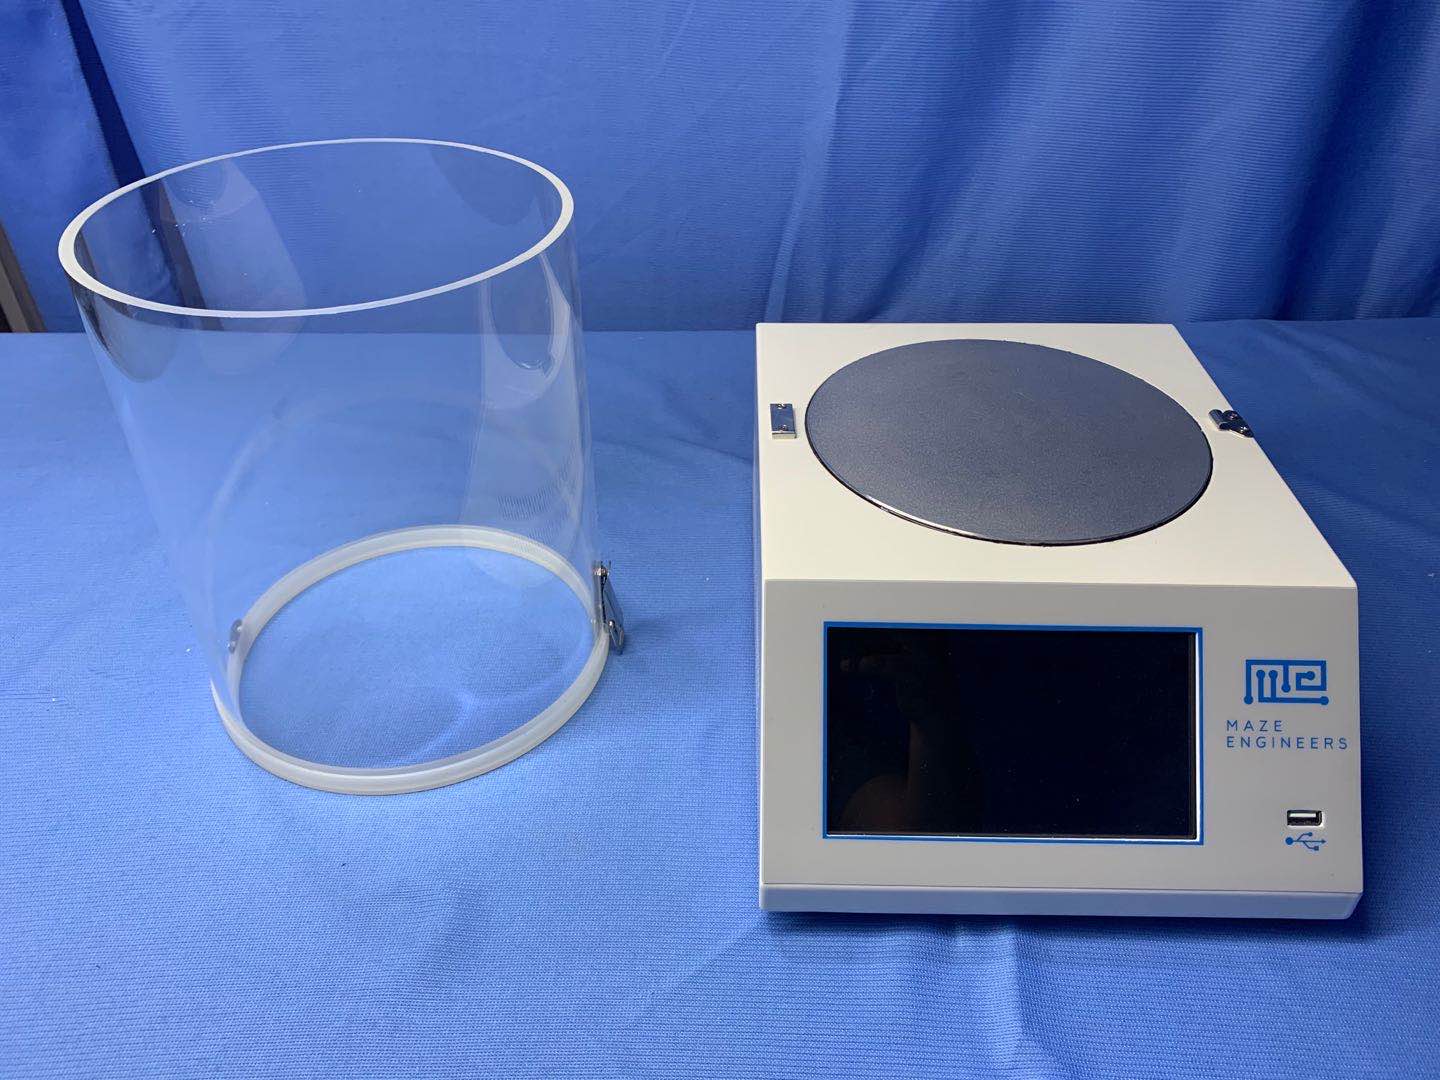
Description
The hot cold plate test is a gold standard thermal pain test in rodents and serves as a useful screening tool for interventions of analgesia. Placing a mouse or rat into a chamber with a hot/cold floor with surrounding clear acrylic walls.
Key features
- Touch screen: high responsive capacitive touch screen 16 x 12 cm
- Temperature range: -5℃ to 65℃ with 0.01℃ precision
- Time precision: within 0.01 second precision
- Data: store 100 group, each group containing 20 data points
- Data Export: via USB drive to CSV data format
- Dimension: cylinder interior diameter 20 cm and height 25 cm; device 30 x 35 x 23 cm (width x depth x height)
Operating steps
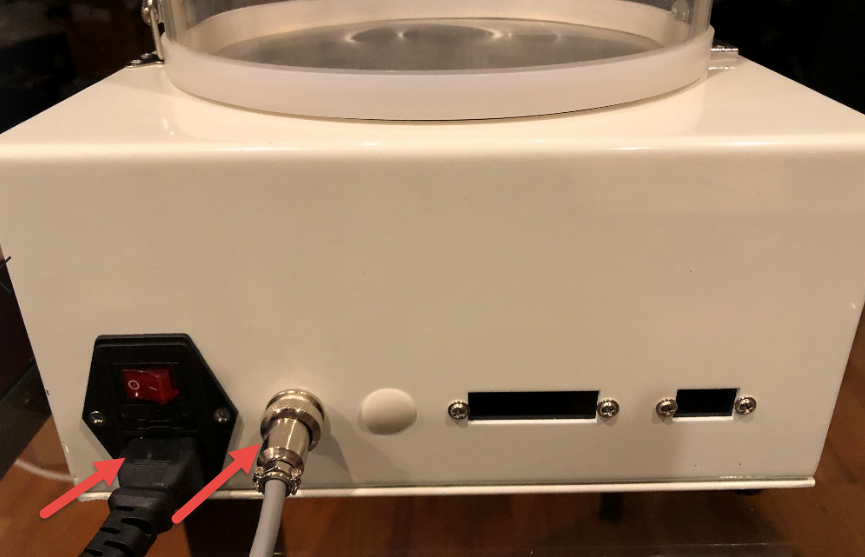
Connection
Connect to foot switch and power source:
Main Screen
The main screen is shown as below when power is on:
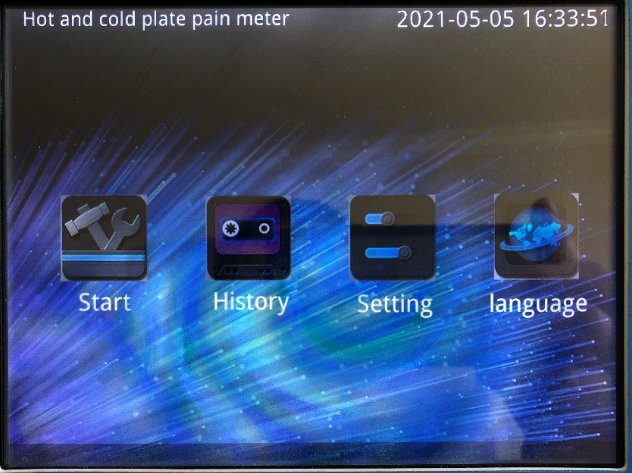
Date time setting - press the date time field for about 3 seconds and the field becomes editable. Enter your local date time.
Setting screen
Press Setting on the main screen to enter the setting screen:
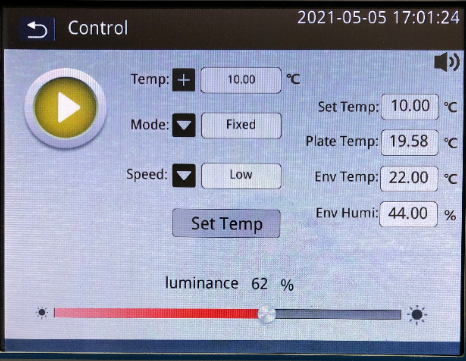
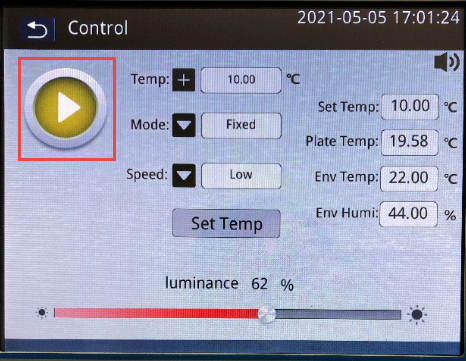
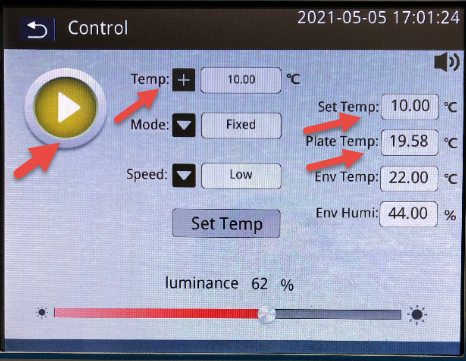
- The button is an indicator that the system is in setting state:
- Speed is a combo field of Steady-High-Low, indicating the temperature acceleration rate. For example, High indicates plate is heated or cooled in the high speed.
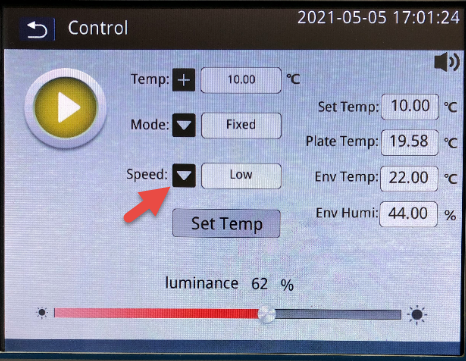
- Click the temperature + button and enter the target level. Then press button Set Temp

The mode is default to Fixed.
- Temperature display
After a temperature, say 10, is entered, and Set Temp button is pressed, the Set Temp field displays the target temperature and the current state becomes Cold/Heat. Plate Temp displays the current temperature of the hot/cold plate.
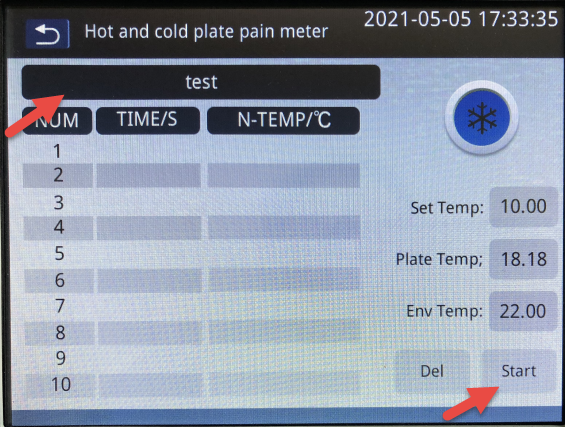
Start screen
After Setting is complete, navigate back to Main Screen and then to Start Screen.
Enter an experiment name and click button Start.
Press foot switch once to start counting; press foot switch once again to stop counting.
Press button Stop to save the data.

Two examples of experiment:
-
Wait for the plate to reach the target temperature, place animal one by one to observe the pain reaction and duration. For a group of up to 10 animals, press Start button to start the experiment. Then place each animal on the hot/cold plate, press foot switch to start counting; then press foot switch to stop counting. After all animal is tested, press Stop button.
-
Place the animal in the hot/cold plate and observe the animal behavior. Press the foot switch. If the animal reaches the pain threshold, press foot switch to stop counting (time duration and temperature threshold are displayed) and then press Stop button. Once Stop button is pressed, the result is recorded. This way, the max tolerance of the hot/cold pain can be measured.
History screen
Go to History screen from the Main Screen:
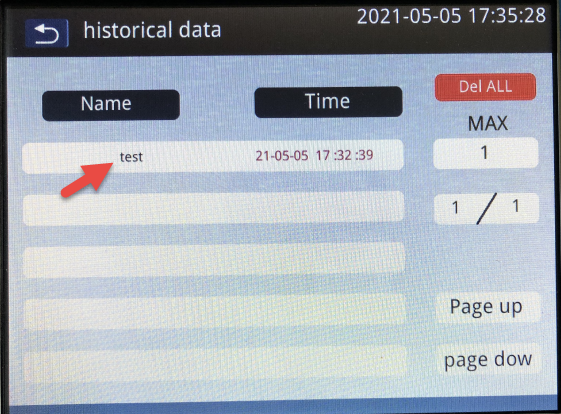
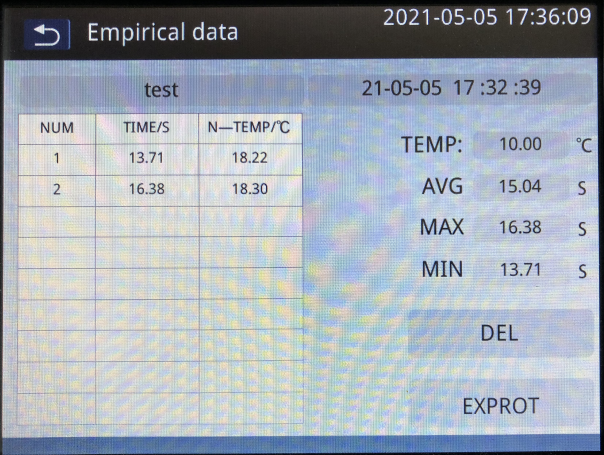
Press the data group and the data set details are shown.
Press Export to export the data to USB drive (make sure you insert the USB drive).